
Seeking For Alternatives
UPDATE: Recently, I published The complete guide to iOS & macOS development in Neovim. It’s the next part about Neovim integration which also covers most things from this post. You may want to read it first :).
Some time ago, I learned how to use Vim and Vim motions. Since then, I can’t live without at least Vim motions, which I use all the time in Xcode (by enabling Editor -> Vim Mode).
With Vim motions, I also discovered the power of Neovim editor. I was able to see how good and configurable my development could be. I spent hours adjusting Neovim to my specific needs and I loved it. I wanted to try app development in Neovim, VS Code, or actually, anything other than Xcode to stop being frustrated by missing things that Apple has failed to provide for many years.
I wanted to use another code editor at least to write some code chunks comfortably and then go back to Xcode for debugging, SwiftUI previews, etc.
However, it quickly turned out that it is not easy to get the autocompletion outside of Xcode for iOS projects. I spent weeks trying different things to make it work properly. I asked here and there and it seemed like nobody achieved that, at least I couldn’t find any meaningful and working solution with a typical iOS project.
SourceKit-LSP
The core responsible for providing autocompletion is LSP. Language Server Protocol was introduced to avoid custom integrations between all programming languages and all IDEs. To avoid reinventing the wheel every time the new IDE appears. Following this protocol, a community or a language author can implement one server to provide the autocompletion for all IDEs supporting LSP at once.
Swift has its LSP called sourcekit-lsp, which is embedded inside Xcode at path:
Xcode.app/Contents/Developer/Toolchains/XcodeDefault.xctoolchain/usr/bin/sourcekit-lsp
However, as always, Apple prepared for us some trap. Their LSP works but only with Swift Package Manager projects. It doesn’t understand xcodeproj or xcworkspace, which makes it useless for iOS & macOS app development…
LSP needs an index that is created when you build the application. If LSP is unable to understand and build your project, it won’t be able to provide autocompletion. At this point, I almost gave up. I knew I wouldn’t be able to work around it if this functionality was not supported by sourcekit-lsp.
That’s why I decided to open a ticket on GitHub in sourcekit-lsp repository to request support for iOS development.
Xcode-Build-Server
In the ticket I created, SolaWing told me about his project called xcode-build-server. I learned that besides the communication between IDE and LSP, there can be also an additional component responsible for building the project and communicating back with LSP using the Build Server Protocol.
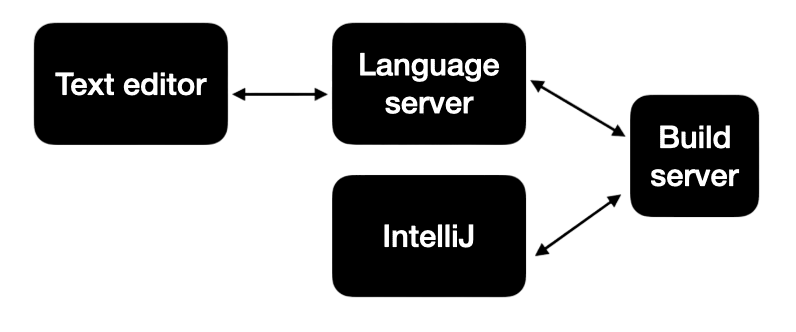
Fortunately, sourcekit-lsp supports BSP and SolaWing created the project implementing the Build Server Protocol to provide the missing part for sourcekit. I tried it and autocompletion worked like a charm!
What Can You Expect?
Of course, you won’t be able to uninstall Xcode and start working fully in another IDE. Xcode still provides many things that are essential for development like SwiftUI previews, debugger, editor for project settings, signing management, etc. Most of that could be done from the command line, but I don’t think it would be worth it.
This setup will let you code in your favorite editor for as long as possible and only go back to Xcode when you need its features. I think this approach will work well especially when you know that you have a big chunk of code to write without lots of launching and debugging of the application in the meantime.
The main benefit you will get is a better ability to refactor and navigate through your code (not many IDEs are as bad as Xcode), and if you love Vim like me, you will be able to use its full potential. Xcode provides only a very limited number of Vim-related features. It doesn’t even support the “dot” command 🤦♂️.
How To Set Up Visual Studio Code
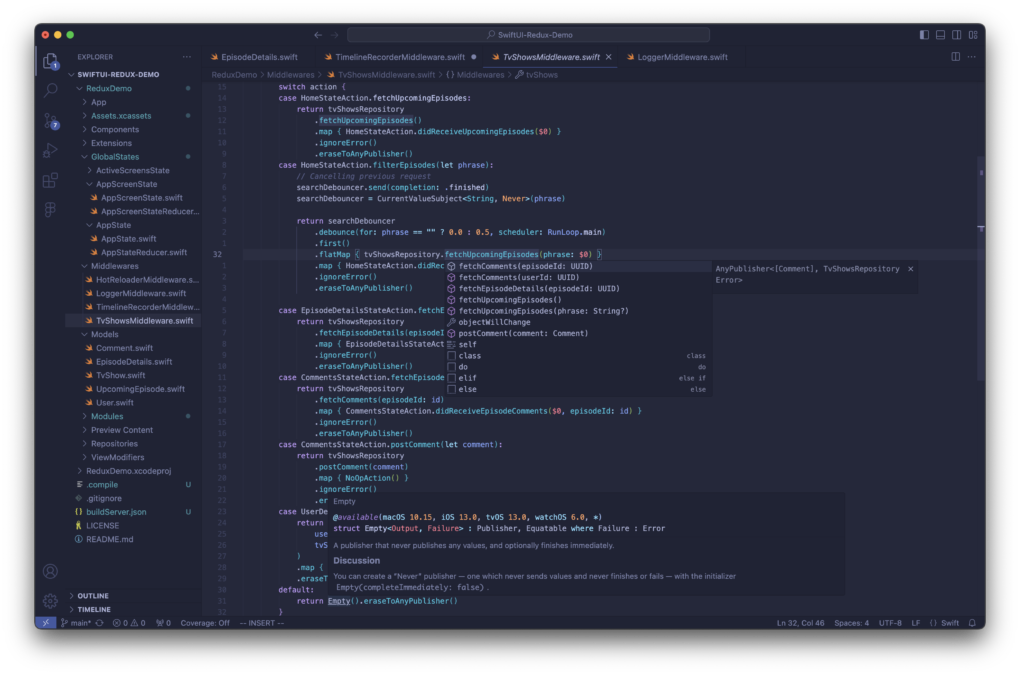
Below you will find steps to make autocompletion work in Visual Studio Code when you open a folder with any iOS/macOS project.
1. Install the official Swift extension created by Swift Server Work Group.
2. Build your project in Xcode.
3. Download or clone the repository of xcode-build-server.
4. Create a link file to xcode-build-server file from the downloaded directory:
|
1 |
ln -s PATH/TO/xcode-build-server /usr/local/bin |
5. Navigate to your project and run:
|
1 2 3 |
# *.xcworkspace or *.xcodeproj should be unique. can be omit and will auto choose the unique workspace or project. xcode-build-server config -scheme <XXX> -workspace *.xcworkspace xcode-build-server config -scheme <XXX> -project *.xcodeproj |
This will create a buildServer.json. If you have your project in a subdirectory, you can move the generated file to your git root, it doesn’t have to be together with your project file.
6. Open the directory with your iOS project in Visual Studio Code. Autocompletion should work automatically.
Troubleshooting
If you have any problems, running xcode-build-server command and building the project in Xcode again usually helps.
If you don’t have Xcode in Applications, you may need to set manually sourcekit-lsp path. To do that, just hit CMD+, in VS Code and search for “sourcekit”.
How To Set Up Neovim
With Neovim I went further. I managed to set up all the necessary tools for my enterprise development like SwiftFormat and SwiftLint. Also, I managed to set up a build command to navigate through build errors.
Build Your Project
First, you need to build your project in Xcode to let the next steps work properly.
Xcode-Build-Server
To make LSP work we need to generate buildServer.json using xcode-build-server. To do that we need to download or clone the repository of xcode-build-server. Once we have it, we need to create a link to xcode-build-server by running this command:
|
1 |
ln -s PATH/TO/xcode-build-server /usr/local/bin |
The last step is to generate the buildServer.json file by running:
|
1 2 3 |
# *.xcworkspace or *.xcodeproj should be unique. can be omit and will auto choose the unique workspace or project. xcode-build-server config -scheme <XXX> -workspace *.xcworkspace xcode-build-server config -scheme <XXX> -project *.xcodeproj |
LSP Configuration
For LSP I’m using the nvim-lspconfig plugin. My sourcekit-lsp configuration looks like this:
|
1 2 3 4 5 6 7 8 9 10 11 12 13 14 |
lspconfig["sourcekit"].setup({ capabilities = capabilities, on_attach = on_attach, cmd = { "/Applications/Xcode.app/Contents/Developer/Toolchains/XcodeDefault.xctoolchain/usr/bin/sourcekit-lsp", }, root_dir = function(filename, _) local util = require("lspconfig.util") return util.root_pattern("buildServer.json")(filename) or util.root_pattern("*.xcodeproj", "*.xcworkspace")(filename) or util.find_git_ancestor(filename) or util.root_pattern("Package.swift")(filename) end, }) |
The important part is to find the root directory with buildServer.json.
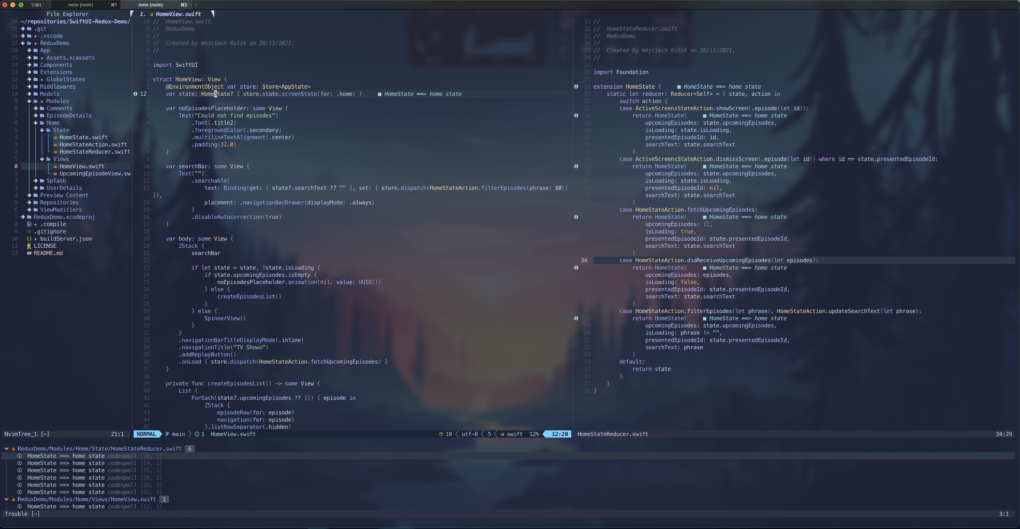
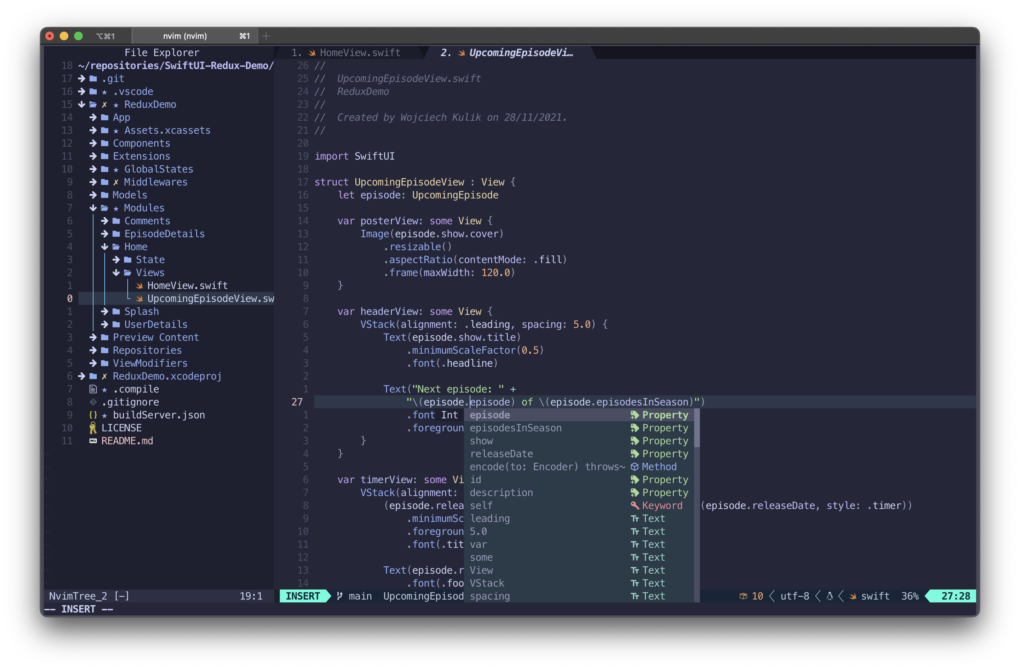
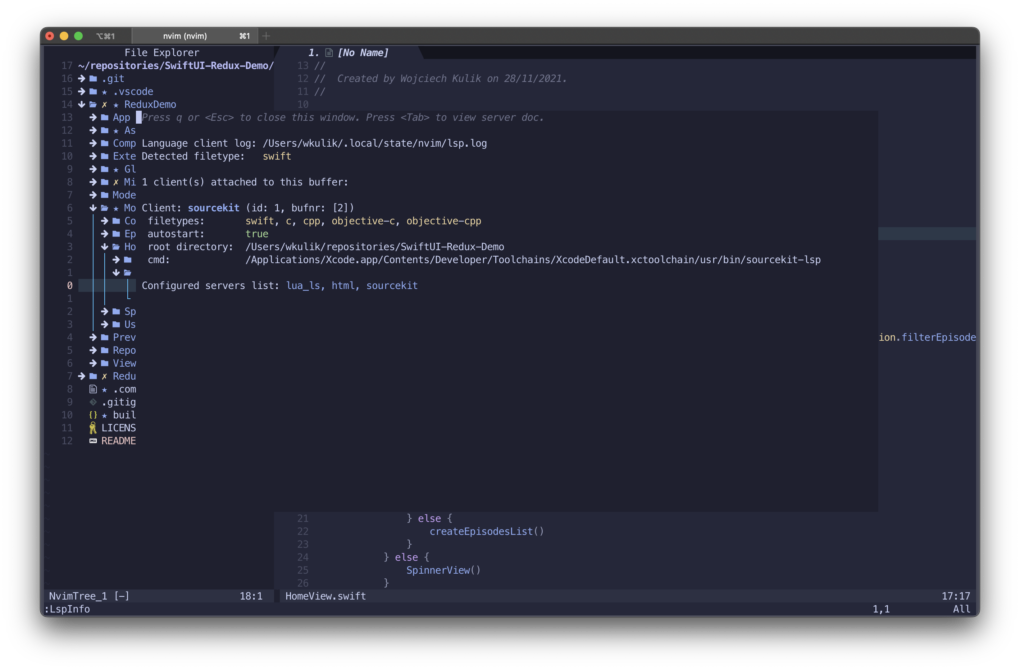
Trying It Out
Now, when all steps are done, open the root directory of your project in Neovim, open some Swift file, and run :LspInfo if everything is ok you should see that sourcekit is attached to your buffer and the root directory is properly configured.
SwiftFormat Configuration
Another important part of my development is to be able to format code based on unified rules. In Xcode, I’m using SwiftFormat.
In Neovim I was able to configure it using conform.nvim plugin. The support for SwiftFormat is built-in there, but I needed some adjustments. To simplify things I created a global .swiftformat file but if you need you can also create some function to find it in project files.
I installed SwiftFormat using Homebrew and then I defined my custom formatter in the setup function of conform.nvim:
|
1 2 3 4 5 6 7 8 9 10 11 12 13 14 15 16 17 18 19 20 21 22 23 24 25 26 27 28 29 30 31 32 33 34 35 36 37 38 39 40 41 42 43 44 45 |
return { "stevearc/conform.nvim", event = { "BufReadPre", "BufNewFile" }, config = function() local conform = require("conform") conform.setup({ formatters_by_ft = { swift = { "swiftformat_ext" }, }, -- format_on_save = { -- timeout_ms = 500, -- lsp_fallback = true, -- }, format_on_save = nil, log_level = vim.log.levels.ERROR, formatters = { swiftformat_ext = { command = "swiftformat", args = { "--config", "~/.config/nvim/.swiftformat", "--stdinpath", "$FILENAME" }, range_args = function(ctx) return { "--config", "~/.config/nvim/.swiftformat", "--linerange", ctx.range.start[1] .. "," .. ctx.range["end"][1], } end, stdin = true, condition = function(ctx) return vim.fs.basename(ctx.filename) ~= "README.md" end, }, }, }) vim.keymap.set({ "n", "v" }, "<leader>mp", function() conform.format({ lsp_fallback = true, async = false, timeout_ms = 500, }) end, { desc = "Format file or range (in visual mode)" }) end, } |
SwiftLint Configuration
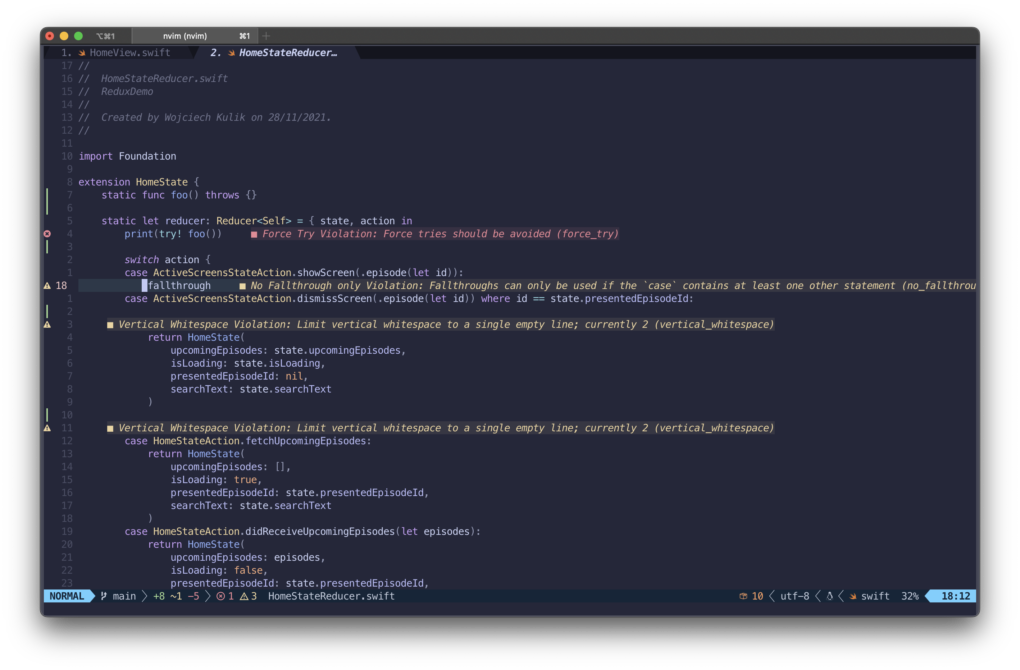
We also need SwiftLint to make sure that our code meets formatting standards. For linting in Neovim there is a very good plugin nvim-lint. Unfortunately, it doesn’t support SwiftLint, so we have to configure it manually.
I also installed SwiftLint using Homebrew. Then I defined my custom linter in the setup function:
|
1 2 3 4 5 6 7 8 9 10 11 12 13 14 15 16 17 18 19 20 21 22 23 24 25 26 27 28 29 30 31 32 33 34 35 36 37 38 39 40 41 42 43 44 45 46 47 48 49 |
return { "mfussenegger/nvim-lint", event = { "BufReadPre", "BufNewFile" }, config = function() local lint = require("lint") -- swiftlint local pattern = "[^:]+:(%d+):(%d+): (%w+): (.+)" local groups = { "lnum", "col", "severity", "message" } local defaults = { ["source"] = "swiftlint" } local severity_map = { ["error"] = vim.diagnostic.severity.ERROR, ["warning"] = vim.diagnostic.severity.WARN, } lint.linters.swiftlint = { cmd = "swiftlint", stdin = true, args = { "lint", "--use-stdin", "--config", os.getenv("HOME") .. "/.config/nvim/.swiftlint.yml", "-", }, stream = "stdout", ignore_exitcode = true, parser = require("lint.parser").from_pattern(pattern, groups, severity_map, defaults), } -- setup lint.linters_by_ft = { swift = { "swiftlint" }, } local lint_augroup = vim.api.nvim_create_augroup("lint", { clear = true }) vim.api.nvim_create_autocmd({ "BufWritePost", "BufReadPost", "InsertLeave", "TextChanged" }, { group = lint_augroup, callback = function() require("lint").try_lint() end, }) vim.keymap.set("n", "<leader>ml", function() require("lint").try_lint() end, { desc = "Lint file" }) end, } |
Here I’m also using a global .swiftlint.yml file. With this configuration, linting will happen whenever the code is changed. I could also manually refresh it by hitting <leader>ml.
Building Project & Showing Errors
The last functionality that we need is to be able to build the project and see if there are any errors after we make changes.
I found this interesting documentation page of Neovim explaining how to setup :make command so that it shows errors in built-in diagnostics.
To make it work we just need to define two things: makeprg variable to define our build command and efm to define a pattern to find errors in build logs.
We can run these commands directly from Neovim once our project is open. I managed to create the following pattern for errors:
|
1 |
:set efm=%f:%l:%c:\ %t%*[^:]:\ %m |
and the following command to build iOS app:
|
1 |
:set makeprg=xcodebuild\ -scheme\ <Scheme>\ -destination\ 'platform=iOS\ Simulator,name=iPhone\ 14,os=16.4'\ -workspace\ <Project>.xcworkspace |
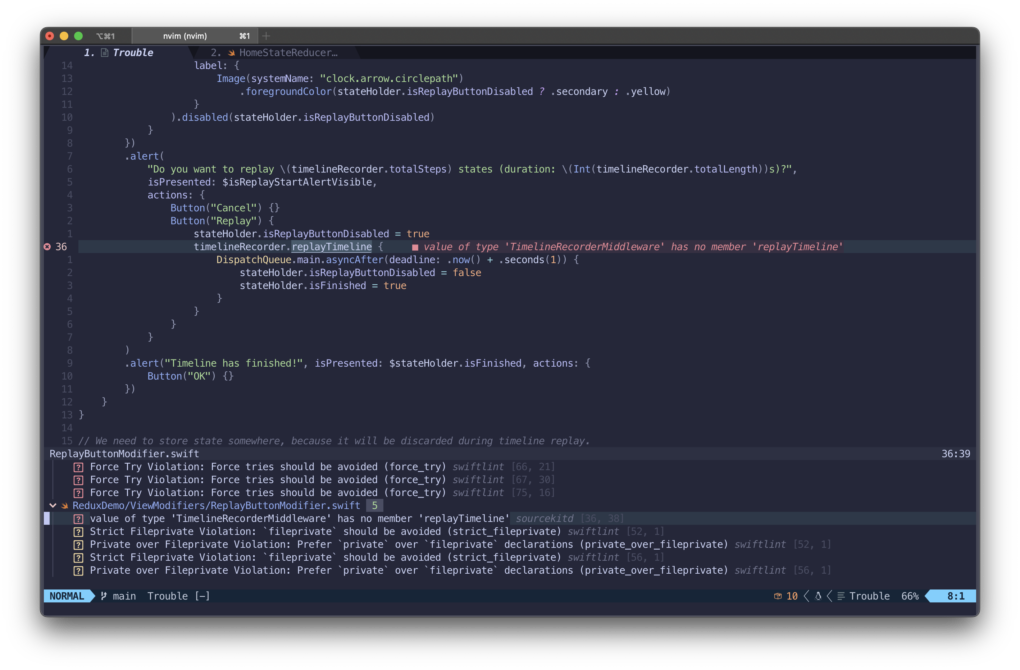
After those two things are configured you can call :make. Once the build is finished you should see errors in diagnostics if there are any. I also use trouble.nvim for a nicer presentation of errors.
Build Command Per Project
The approach presented above, requires us to set those two things every time we open Neovim. However, we can optimize this process and create a configuration file per project. To do that, first, we need to enable local config files in our main config by setting:
|
1 2 |
vim.opt.exrc = true vim.opt.secure = true |
Now, we can create in our project root directory a file called .nvimrc and put build settings there:
|
1 2 |
set efm=%f:%l:%c:\ %t%*[^:]:\ %m set makeprg=xcodebuild\ -scheme\ <Scheme>\ -destination\ 'platform=iOS\ Simulator,name=iPhone\ 14,os=16.4'\ -project\ <Project>.xcodeproj |
Every time we open Neovim, build commands will be set automatically.
Summary
The configuration presented in this article is of course very basic. The main purpose was to show how to make all essential elements work in Neovim to be able to develop iOS & macOS apps. However, for sure you will need some personal adjustments to make it more comfortable for yourself.
I spent many weeks trying to figure it out and finally it turned out to be possible to achieve and at least partially take advantage of the power that is provided by other editors than Xcode.
All of this was possible because of the secret glue, the magic powder xcode-build-server that enables LSP for iOS and macOS apps. Huge kudos to SolaWing for that!
I found also the channel of Josean Martinez to be an extremely useful source of knowledge on Neovim configuration. I learned from there about conform.nvim, nvim-lint, and many more plugins that helped me to set it all up. If you want to learn more about how to configure your Neovim, I recommend checking all his videos.
Boost Your Work
Psst! If you want to boost your productivity even further, check out this app.
Snippety is a tool that can make daily tasks more enjoyable by providing quick access to your snippets. Snippety works flawlessly with every text field! Just press ⌘⇧Space, find your snippet, and hit ↩︎. You can define also your keywords and use snippets by just typing without even opening the app!