
UPDATE: In the meantime, I contributed to multiple repositories to make the configuration simpler. This article contains configs that use those improvements :).
In my previous post, I just scratched the surface of iOS development in Neovim. Since then I discovered many new things that allowed me to move my development almost completely to Neovim.
In this article, I will describe step by step how to configure Neovim to move away from Xcode. It took me several months to figure it all out piece by piece and to combine it into one working iOS development environment (I did it so you don’t have to :D). Hopefully, it won’t take you more than half a day to configure it with my help :).
It will be a little bit lengthy trip, and it will require setting up multiple plugins. I would recommend it to people who are already familiar with Vim. If you just installed Neovim, it could be overwhelming to learn Vim motions, Neovim environment, and set up dependencies, all at once.
If you are just starting with Neovim, take it slowly. First, learn Vim motions inside Xcode (by enabling Vim mode), in the meantime start configuring Neovim and get familiar with it by installing plugins, editing text files, JSON files, etc. Once you feel comfortable with Vim motions and Neovim, then try migrating your development :).
Limitations
Of course, there are going to be some limitations, that we can’t work around with other tools, but if you follow this guide, you should be able to do over 90% of the work in your beloved Neovim.
First of all, if you haven’t done it yet, you should forget about xcodeproj and xcworkspace. Another genius Xcode’s invention, completely unmaintainable by anything but Xcode.
Start using XcodeGen (recommended) or Tuist instead! Those tools let you generate a project based on a simple configuration file. It is required to easily add new files, targets, and capabilities outside of Xcode. They provide full project management without touching Xcode.
However, if you wish to stay with xcodeproj, my plugin now supports file management directly in Neovim.
Features That Require Xcode
- More advanced debugging (sanitizers, memory graphs)
- UI debugging (view hierarchy)
- Tracking of memory consumption, CPU usage, energy efficiency
- SwiftUI previews (they stop working sooner or later anyway, you can use Inject)
Test debugging(updated: it’s been integrated into my plugin)Code coverage(updated: it’s been integrated into my plugin)- Signing management
- Archiving and releasing app (possible via command line, but not supported yet)
- Debugging StoreKit 2
- Xcode Cloud management and integration
Debugging on physical devices(updated: it’s been integrated into my plugin)UI automated tests(updated: it’s been integrated into my plugin)- Probably game and visionOS development?
- Code files in languages other than Swift
- Assets management –
xcassetsis just a set of simple JSON files and folders, but
it’s still probably easier to do it through the built-in editor in Xcode You must use XcodeGen or Tuist. Otherwise, you will need to add files and manage(updated: it’s been integrated into my plugin)
the project configuration from Xcode.
If these are not a big part of your daily work, you will be able to replace Xcode with Neovim.
Code Completion
The most important thing for app development in my opinion is the code completion. It’s hard to imagine development without that.
Also, it was the most challenging thing to resolve in Neovim. Why? Because Apple is being Apple and shares either none or very limited tools that couldn’t be reused by other editors.
Language Server Protocol
Nowadays, we have a lot of programming languages. It wouldn’t be possible to maintain all code completions if every language would require a custom integration. That’s why Microsoft introduced a unified way to do that and defined Language Server Protocol (LSP). Kudos to Visual Studio Code! Now, each language is responsible for providing code completion by implementing LSP.
The problem with Swift + iOS/macOS SDK is that the sourcekit-lsp provided by Apple doesn’t understand Xcode projects. So how could it provide the code completion if it doesn’t understand the project architecture, targets, dependencies, etc.? Exactly, it can’t.
I spent several weeks looking for some solutions, posting here and there, and trying many things. I even received information from people working on Swift that it won’t be possible. However, I didn’t give up and finally, I posted on sourcekit-lsp GitHub a feature request to provide support for iOS development.
Surprisingly, SolaWing appeared and posted there about his tool that covers the gap between sourcekit-lsp and Xcode project. He built a tool called xcode-build-server that implements Build Server Protocol (BSP) to provide all the necessary information about the project to sourcekit-lsp. And it works like a charm!
Sourcekit-lsp and xcode-build-server
The tool created by SolaWing is really great. You only need to run one command in your project directory and that’s it.
First, you have to download xcode-build-server. You can install it by just calling brew install xcode-build-server.
Once it’s done, only one more step is required. You have to create a buildServer.json that will tell LSP to communicate with xcode-build-server. To do that you can simply run one command (most likely, only once for your project lifetime):
|
1 2 3 4 5 6 7 |
# *.xcworkspace or *.xcodeproj should be unique. # It can be omitted and will auto choose the unique workspace or project. # if you use workspace: xcode-build-server config -scheme <XXX> -workspace *.xcworkspace # or if you only have a project file: xcode-build-server config -scheme <XXX> -project *.xcodeproj |
If your project is not in the root directory, you should move the generated buildServer.json to the root.
Neovim LSP Integration
The most important step is done. Now, our xcode-build-server will be able to provide information
about the project. We just need to integrate our Neovim with sourcekit-lsp.
To do that we will need nvim-lspconfig plugin. Here is a sample configuration:
|
1 2 3 4 5 6 7 8 9 10 11 12 13 14 15 16 17 18 19 20 21 22 23 24 25 26 27 28 29 |
return { "neovim/nvim-lspconfig", event = { "BufReadPre", "BufNewFile" }, dependencies = { "hrsh7th/cmp-nvim-lsp", { "antosha417/nvim-lsp-file-operations", config = true }, }, config = function() local lspconfig = require("lspconfig") local util = require("lspconfig.util") local cmp_nvim_lsp = require("cmp_nvim_lsp") local capabilities = cmp_nvim_lsp.default_capabilities() local opts = { noremap = true, silent = true } local on_attach = function(_, bufnr) opts.buffer = bufnr opts.desc = "Show line diagnostics" vim.keymap.set("n", "<leader>d", vim.diagnostic.open_float, opts) opts.desc = "Show documentation for what is under cursor" vim.keymap.set("n", "K", vim.lsp.buf.hover, opts) end lspconfig["sourcekit"].setup({ capabilities = capabilities, on_attach = on_attach, }) end, } |
To add support for code completion pop-ups you can use nvim-cmp.
|
1 2 3 4 5 6 7 8 9 10 11 12 13 14 15 16 17 18 19 20 21 22 23 24 25 26 27 28 29 30 31 32 33 34 35 36 37 38 39 40 41 42 43 44 45 46 47 48 49 50 51 52 53 54 55 56 57 58 59 60 61 62 63 64 65 66 |
return { "hrsh7th/nvim-cmp", event = "InsertEnter", dependencies = { "hrsh7th/cmp-buffer", -- source for text in buffer "hrsh7th/cmp-path", -- source for file system paths "L3MON4D3/LuaSnip", -- snippet engine "saadparwaiz1/cmp_luasnip", -- for autocompletion "rafamadriz/friendly-snippets", -- useful snippets "onsails/lspkind.nvim", -- vs-code like pictograms }, config = function() local cmp = require("cmp") local luasnip = require("luasnip") local lspkind = require("lspkind") -- loads vscode style snippets from installed plugins (e.g. friendly-snippets) require("luasnip.loaders.from_vscode").lazy_load() cmp.setup({ completion = { completeopt = "menu,menuone,preview", }, snippet = { -- configure how nvim-cmp interacts with snippet engine expand = function(args) luasnip.lsp_expand(args.body) end, }, mapping = cmp.mapping.preset.insert({ ["<C-k>"] = cmp.mapping.select_prev_item(), -- previous suggestion ["<C-j>"] = cmp.mapping.select_next_item(), -- next suggestion ["<C-Space>"] = cmp.mapping.complete(), -- show completion suggestions ["<C-e>"] = cmp.mapping.abort(), -- close completion window ["<CR>"] = cmp.mapping.confirm({ select = false, behavior = cmp.ConfirmBehavior.Replace }), ["<C-b>"] = cmp.mapping(function(fallback) if luasnip.jumpable(-1) then luasnip.jump(-1) else fallback() end end, { "i", "s" }), ["<C-f>"] = cmp.mapping(function(fallback) if luasnip.jumpable(1) then luasnip.jump(1) else fallback() end end, { "i", "s" }), }), -- sources for autocompletion sources = cmp.config.sources({ { name = "nvim_lsp" }, { name = "luasnip" }, -- snippets { name = "buffer" }, -- text within current buffer { name = "path" }, -- file system paths }), -- configure lspkind for vs-code like pictograms in completion menu formatting = { format = lspkind.cmp_format({ maxwidth = 50, ellipsis_char = "...", }), }, }) end, } |
Summary
Now the autocompletion should work great within any iOS and macOS project. Just make sure to open Neovim in the root directory of your project. Open any Swift file and run :LspInfo command to see if the LSP server is properly attached and if the root directory is set.
If you encounter any problems, usually building the project from Xcode and running xcode-build-server command again will resolve issues. Sometimes buildServer.json could be corrupted. Open it and make sure that the paths are correct.
Linting & Formatting
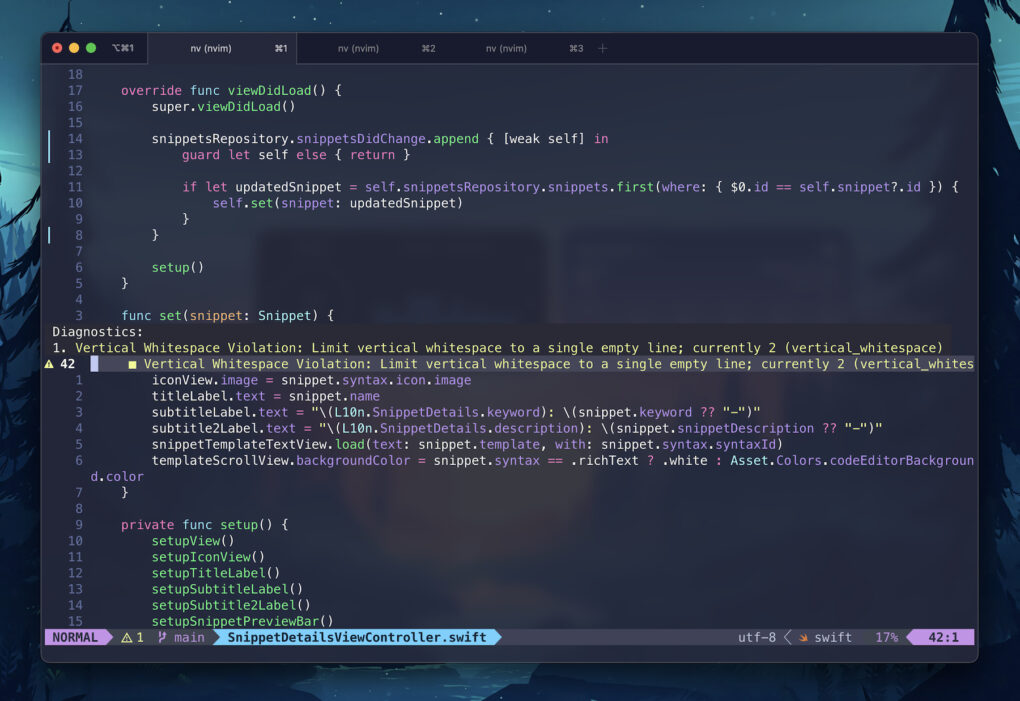
The next milestone in our development in Neovim is setting up a linter and formatter. The most popular choices are SwiftLint and SwiftFormat, so let’s go with them. Both can be installed using Homebrew.
SwiftLint
For linting we will use a plugin called nvim-lint.
|
1 2 3 4 5 6 7 8 9 10 11 12 13 14 15 16 17 18 19 20 21 22 23 24 |
return { "mfussenegger/nvim-lint", event = { "BufReadPre", "BufNewFile" }, config = function() local lint = require("lint") lint.linters_by_ft = { swift = { "swiftlint" }, } local lint_augroup = vim.api.nvim_create_augroup("lint", { clear = true }) vim.api.nvim_create_autocmd({ "BufWritePost", "BufReadPost", "InsertLeave", "TextChanged" }, { group = lint_augroup, callback = function() require("lint").try_lint() end, }) vim.keymap.set("n", "<leader>ml", function() require("lint").try_lint() end, { desc = "Lint file" }) end, } |
SwiftFormat
For formatting, we can use conform.nvim plugin. It provides by default SwiftFormat integration.
|
1 2 3 4 5 6 7 8 9 10 11 12 13 14 15 16 17 18 19 20 21 22 23 24 25 |
return { "stevearc/conform.nvim", event = { "BufReadPre", "BufNewFile" }, config = function() local conform = require("conform") conform.setup({ formatters_by_ft = { swift = { "swiftformat" }, }, format_on_save = function(bufnr) return { timeout_ms = 500, lsp_fallback = true } end, log_level = vim.log.levels.ERROR, }) vim.keymap.set({ "n", "v" }, "<leader>mp", function() conform.format({ lsp_fallback = true, async = false, timeout_ms = 500, }) end, { desc = "Format file or range (in visual mode)" }) end, } |
The Holy Grail – Build, Run & Test
How could you develop apps without running them? We all know that many operations are possible using xcodebuild command line tool and xcrun simctl. However, there is no integration for Neovim to do that out of the box.
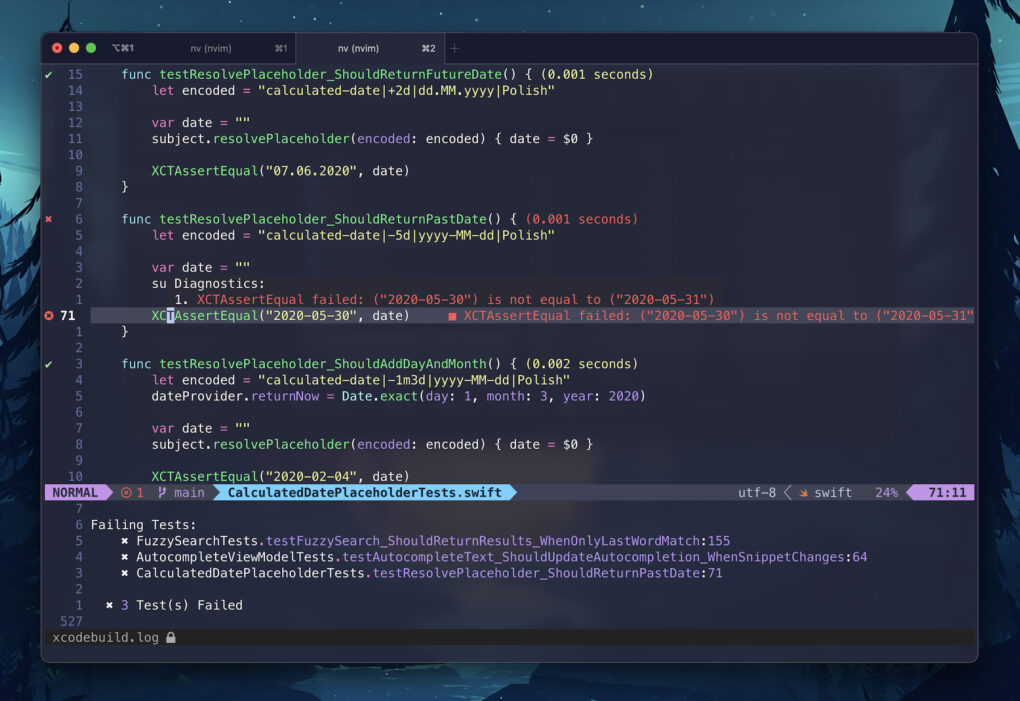
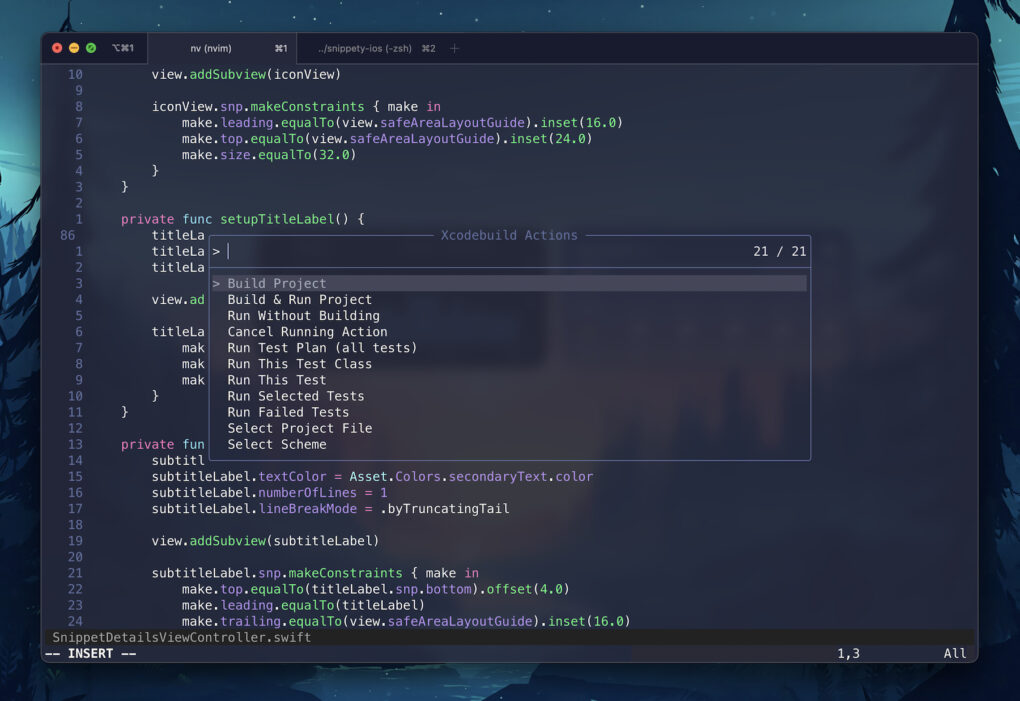
I started wondering how I could achieve that. First, I wanted to create a few simple commands to build and run applications. I started adding them piece by piece and in no time I ended up developing my plugin to do it all for you! I called it xcodebuild.nvim.
The plugin not only allows you to build and run applications, but it also provides an advanced log parser to generate a simple summary, and many additional actions like switching simulators, uninstalling apps, selecting schemes, etc.
However, the most interesting is the integration with tests. The plugin is capable of showing you test results similarly to Xcode with an icon next to each test. Additionally, it shows test duration and adds all problems and failed asserts to the QuickFix list. On top of that, you can even select tests in Visual mode and run only those.
The provided features cover most of the actions that you would expect from IDE.
Xcodebuild.nvim
The integration is fairly simple and doesn’t require any additional steps.
|
1 2 3 4 5 6 7 8 9 10 11 12 13 14 15 16 17 18 19 20 21 22 23 24 25 26 |
return { "wojciech-kulik/xcodebuild.nvim", dependencies = { "nvim-telescope/telescope.nvim", "MunifTanjim/nui.nvim", }, config = function() require("xcodebuild").setup({ code_coverage = { enabled = true, }, }) vim.keymap.set("n", "<leader>xl", "<cmd>XcodebuildToggleLogs<cr>", { desc = "Toggle Xcodebuild Logs" }) vim.keymap.set("n", "<leader>xb", "<cmd>XcodebuildBuild<cr>", { desc = "Build Project" }) vim.keymap.set("n", "<leader>xr", "<cmd>XcodebuildBuildRun<cr>", { desc = "Build & Run Project" }) vim.keymap.set("n", "<leader>xt", "<cmd>XcodebuildTest<cr>", { desc = "Run Tests" }) vim.keymap.set("n", "<leader>xT", "<cmd>XcodebuildTestClass<cr>", { desc = "Run This Test Class" }) vim.keymap.set("n", "<leader>X", "<cmd>XcodebuildPicker<cr>", { desc = "Show All Xcodebuild Actions" }) vim.keymap.set("n", "<leader>xd", "<cmd>XcodebuildSelectDevice<cr>", { desc = "Select Device" }) vim.keymap.set("n", "<leader>xp", "<cmd>XcodebuildSelectTestPlan<cr>", { desc = "Select Test Plan" }) vim.keymap.set("n", "<leader>xc", "<cmd>XcodebuildToggleCodeCoverage<cr>", { desc = "Toggle Code Coverage" }) vim.keymap.set("n", "<leader>xC", "<cmd>XcodebuildShowCodeCoverageReport<cr>", { desc = "Show Code Coverage Report" }) vim.keymap.set("n", "<leader>xq", "<cmd>Telescope quickfix<cr>", { desc = "Show QuickFix List" }) end, } |
By default, the plugin uses xcbeautify to format logs. You can install it using Homebrew or you can change it to something else or disable the formatter completely in the setup function:
|
1 2 3 4 5 6 7 8 9 10 11 12 13 14 15 16 17 |
return { "wojciech-kulik/xcodebuild.nvim", dependencies = { "nvim-telescope/telescope.nvim", "MunifTanjim/nui.nvim", }, config = function() require("xcodebuild").setup({ logs = { logs_formatter = nil, }, code_coverage = { enabled = true, }, }) end, } |
You can start the plugin by calling XcodebuildPicker command to configure the project and select
some actions. For more details, please see README.md.
The Last Step – Debugging
We are almost there. You can’t develop apps without a properly working debugger. It’s a must-have. Fortunately, the Neovim community has a solution for that as well.
lldb / codelldb
To debug iOS applications you can connect the debugger to your app process by using lldb command line debugger included in Xcode. However, we will need something more to connect it with our Neovim.
Here is a similar situation to the one with autocompletion. It would be a nightmare to provide a custom integration by each IDE for each language. Therefore, Debug Adapter Protocol (DAP) has been introduced, again by Microsoft, to unify that.
Of course, Apple doesn’t provide any integration with DAP. However, the community comes to the rescue one more time and they built a tool called codelldb. It can debug not only Swift but also C++, Rust, Fortran, Kotlin Native, Nim, Objective-C, Pascal, and Zig.
It’s a Visual Studio Code plugin but we can use it with Neovim as well. First, download the latest release for DARWIN architecture from HERE and UNZIP the vsix file to the location where you want to keep it.
nvim-dap
The most popular plugin for debugging is nvim-dap. You can easily integrate it with codelldb to provide support for iOS and macOS apps.
To avoid manual work with building, running, and attaching, my plugin xcodebuild.nvim provides some helping functions for integration with nvim-dap. Just check out the code below and update the path.
|
1 2 3 4 5 6 7 8 9 10 11 12 13 14 15 16 17 18 19 20 21 22 |
return { "mfussenegger/nvim-dap", dependencies = { "wojciech-kulik/xcodebuild.nvim" }, config = function() local xcodebuild = require("xcodebuild.integrations.dap") -- TODO: change it to your local codelldb path local codelldbPath = os.getenv("HOME") .. "/tools/codelldb-aarch64-darwin/extension/adapter/codelldb" xcodebuild.setup(codelldbPath) vim.keymap.set("n", "<leader>dd", xcodebuild.build_and_debug, { desc = "Build & Debug" }) vim.keymap.set("n", "<leader>dr", xcodebuild.debug_without_build, { desc = "Debug Without Building" }) vim.keymap.set("n", "<leader>dt", xcodebuild.debug_tests, { desc = "Debug Tests" }) vim.keymap.set("n", "<leader>dT", xcodebuild.debug_class_tests, { desc = "Debug Class Tests" }) vim.keymap.set("n", "<leader>b", xcodebuild.toggle_breakpoint, { desc = "Toggle Breakpoint" }) vim.keymap.set("n", "<leader>B", xcodebuild.toggle_message_breakpoint, { desc = "Toggle Message Breakpoint" }) vim.keymap.set("n", "<leader>dx", xcodebuild.terminate_session, { desc = "Terminate Debugger" }) end, } |
nvim-dap-ui
To get a more familiar debugging experience you will need nvim-dap-ui. It is an extension for nvim-dap that will show you automatically all panels necessary for debugging. This is another must-have.
You can easily modify the layout, icons, and adjust the debugging mode to your needs. The integration is very simple.
|
1 2 3 4 5 6 7 8 9 10 11 12 13 14 15 16 17 18 19 20 21 22 23 24 25 26 27 28 29 30 31 32 33 34 35 36 37 38 39 40 41 42 43 44 45 46 47 48 49 50 51 52 |
return { "rcarriga/nvim-dap-ui", dependencies = { "mfussenegger/nvim-dap", }, lazy = true, config = function() require("dapui").setup({ controls = { element = "repl", enabled = true, }, floating = { border = "single", mappings = { close = { "q", "<Esc>" }, }, }, icons = { collapsed = "", expanded = "", current_frame = "" }, layouts = { { elements = { { id = "stacks", size = 0.25 }, { id = "scopes", size = 0.25 }, { id = "breakpoints", size = 0.25 }, { id = "watches", size = 0.25 }, }, position = "left", size = 60, }, { elements = { { id = "repl", size = 0.35 }, { id = "console", size = 0.65 }, }, position = "bottom", size = 10, }, }, }) local dap, dapui = require("dap"), require("dapui") dap.listeners.after.event_initialized["dapui_config"] = function() dapui.open() end dap.listeners.before.event_terminated["dapui_config"] = function() dapui.close() end dap.listeners.before.event_exited["dapui_config"] = function() dapui.close() end end, } |
Summary
Now you should be able to build, run, and debug the app by simply hitting <leader>dd. Once the app is running the debugger should be automatically attached.
Complete Configuration
I prepared a sample config using LazyVim. It covers all the features presented in this article. If you want to try it out, check out this repository: ios-dev-starter-nvim. Make sure to install all necessary dependencies.
Final Words
Hell has frozen over! Using the approach described above you will barely need to open Xcode to develop apps.
It took me several months, step by step, to get to this point. In the end, I had to take things into my own hands and implement xcodebuild.nvim plugin, but the journey was worth it!
If you followed this guide, you should end up with a working code completion, linting, formatting, debugger, and basic actions to test, build, run, and deploy apps to simulators. All together covers at least 90% of the development time.
I’ve been using this approach for some time and I’m very happy with the results. Neovim works great and I’m not a prisoner of dumb Xcode limitations anymore. I don’t have to wait another 5 years to get a reliably working rename, to get fuzzy search, or to get “dot” support in Vim mode.
There are a lot of third-party dependencies here, so you may face some problems at some point. This article was written in a way that should allow you to copy section by section without any extra steps. However, if you encounter difficulties, or if something is unclear, feel free to post a comment.
Neovim is a very extensible tool, you can easily configure or add anything you like. As you can see, I was able to create a complex plugin providing test integration similar to the one in Xcode and it all took only around 2 weeks (and is most likely more reliable than the one in Xcode).
All the best in the new era of iOS & macOS development outside of Xcode.
Boost Your Work
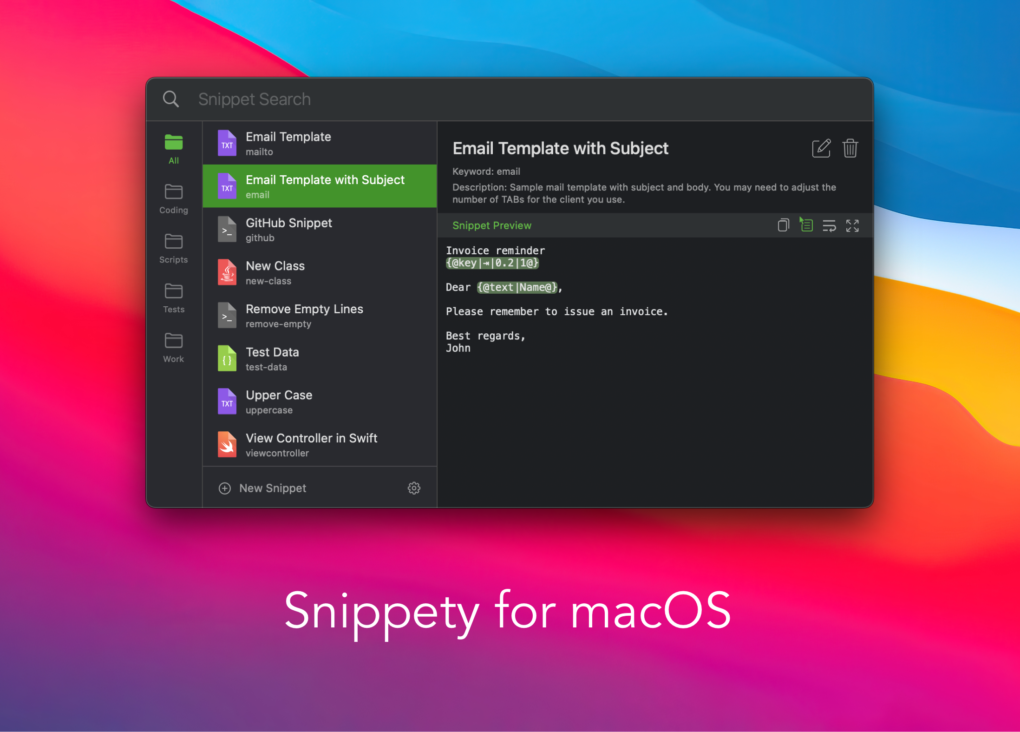
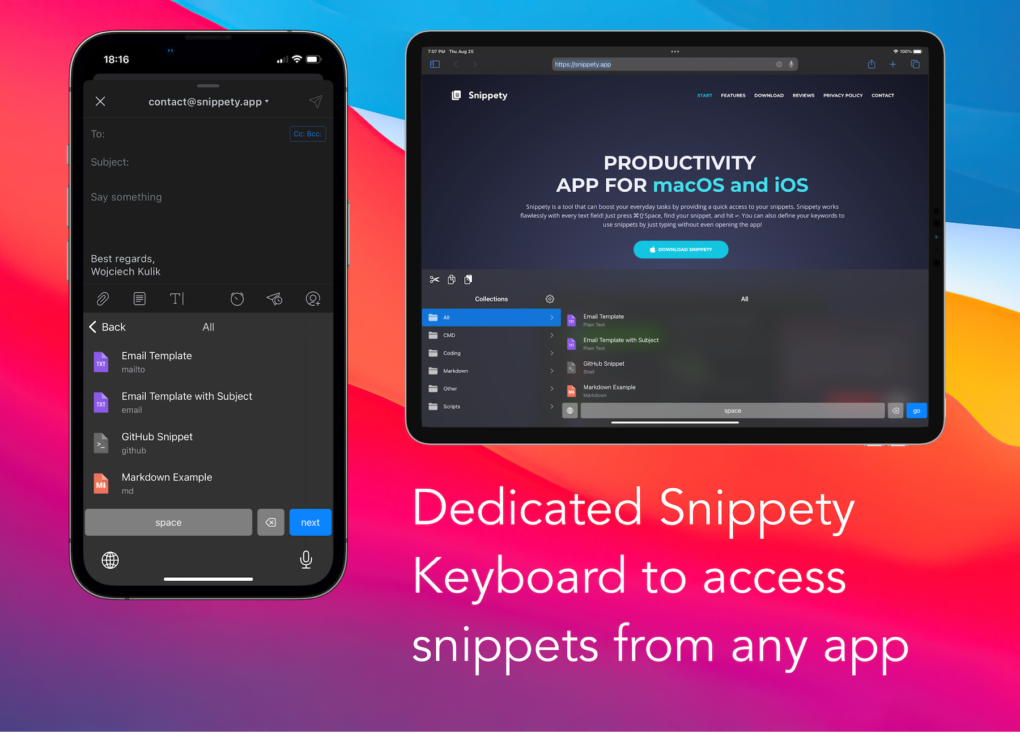
Psst! If you want to boost your productivity even further, check out this app.
Snippety is a tool that can make daily tasks more enjoyable by providing quick access to your snippets. Snippety works flawlessly with every text field! Just press ⌘⇧Space, find your snippet, and hit ↩︎. You can define also your keywords and use snippets by just typing without even opening the app!